File list
From Armagetron
This special page shows all uploaded files.
| Date | Name | Thumbnail | Size | User | Description | Versions |
|---|---|---|---|---|---|---|
| 06:20, 7 October 2014 | Bracketstutorial02.jpg (file) | 11 KB | Titanoboa | 1 | ||
| 06:22, 7 October 2014 | Bracketstutorial03.jpg (file) |  |
11 KB | Titanoboa | 1 | |
| 06:26, 7 October 2014 | Bracketstutorial04.jpg (file) | 17 KB | Titanoboa | 1 | ||
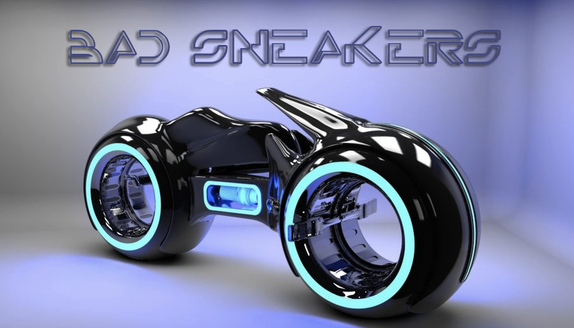
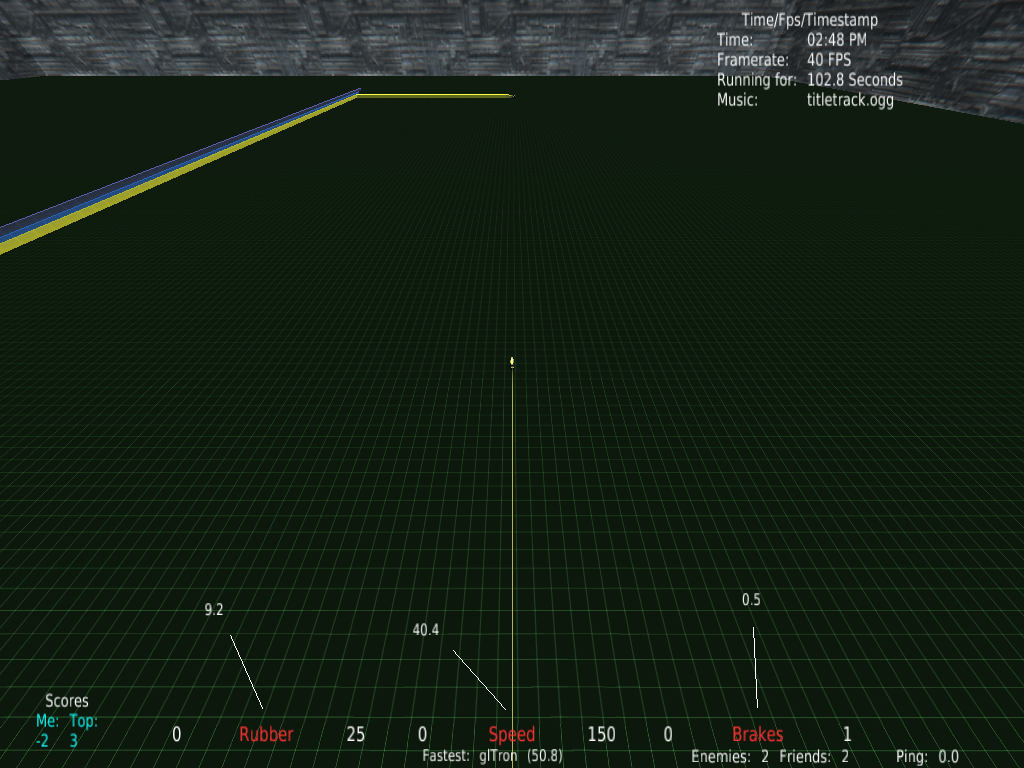
| 09:41, 26 July 2015 | Bs title.png (file) |  |
222 KB | Babos | Bs Title Picture | 1 |
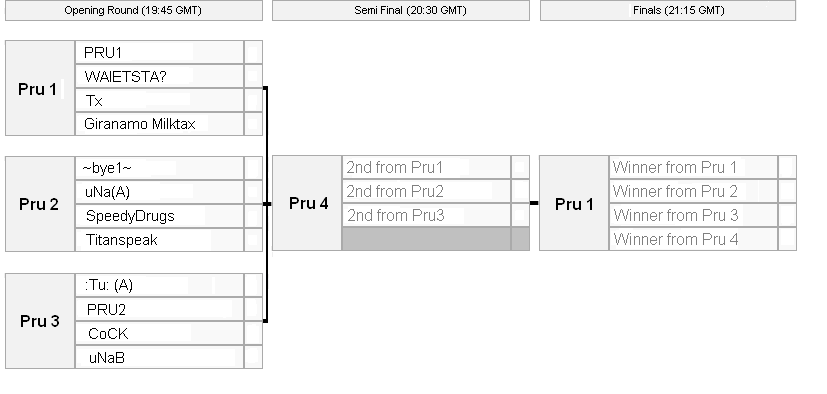
| 06:37, 22 August 2010 | C&P2brackets.PNG (file) |  |
11 KB | Word | 2 | |
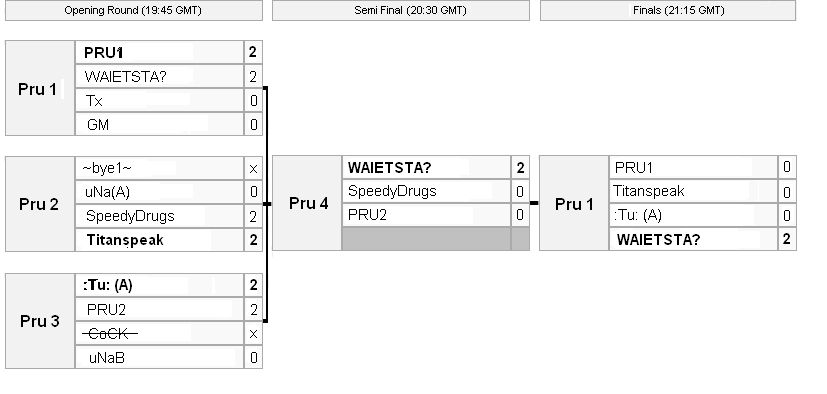
| 17:35, 22 August 2010 | C&P2brackets2.PNG (file) |  |
17 KB | Titanoboa | 1 | |
| 13:19, 6 July 2006 | CAT.gif (file) |  |
2 KB | Xevic | Catalonia Flag | 1 |
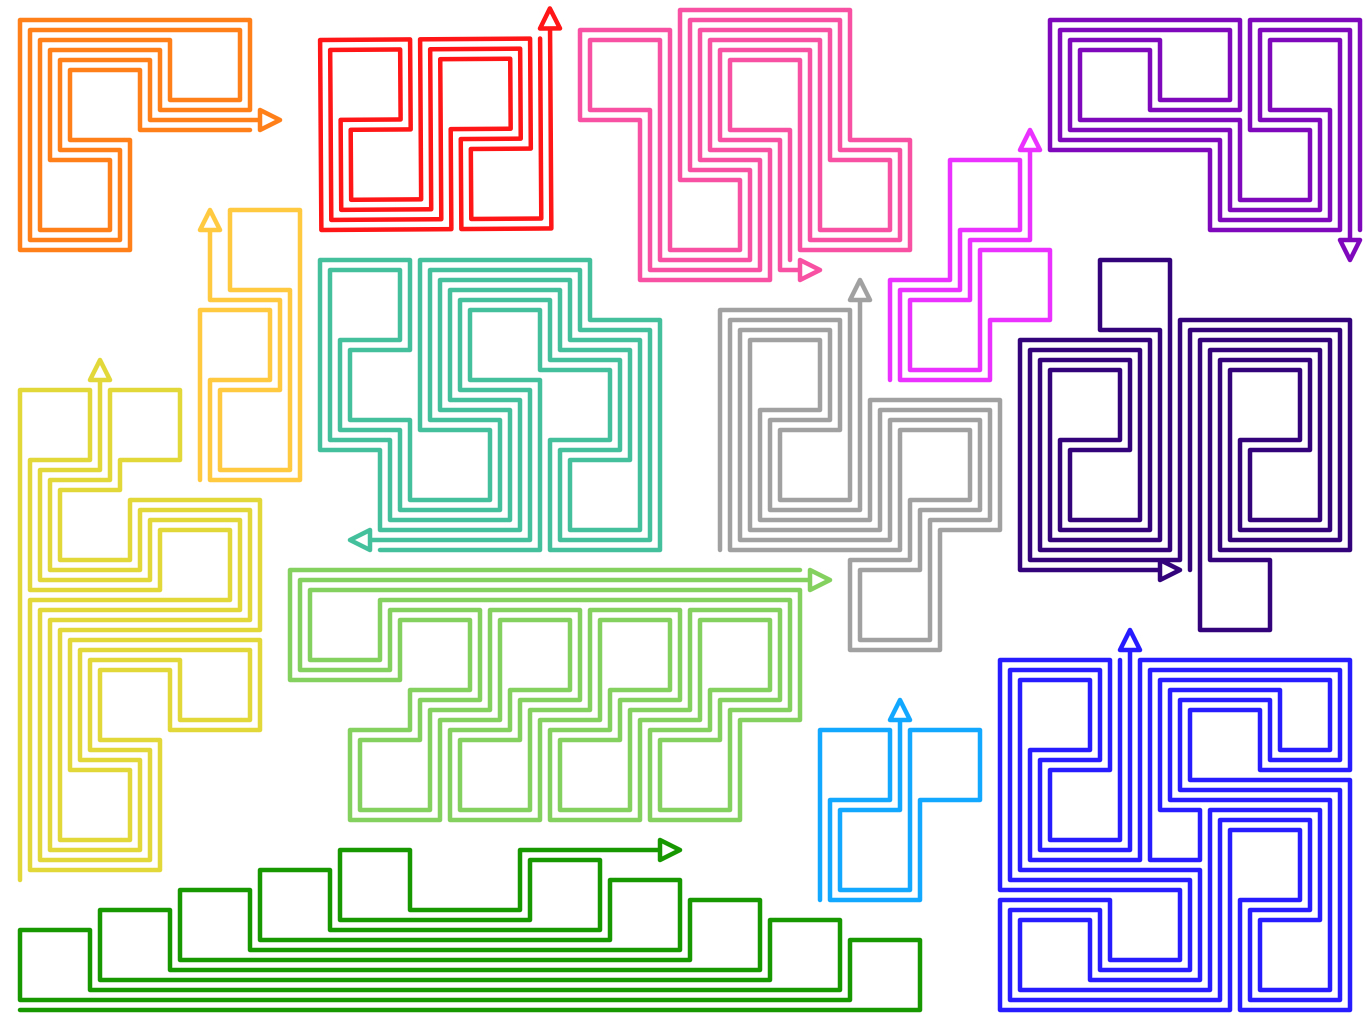
| 18:37, 8 August 2021 | Cadi-assorted-mazes.JPG (file) |  |
740 KB | Cadillac | A number of common mazes | 1 |
| 11:42, 2 August 2022 | CadiCockpitOff.png (file) |  |
614 KB | Cadillac | Cadillac's Cockpit with all toggles off | 1 |
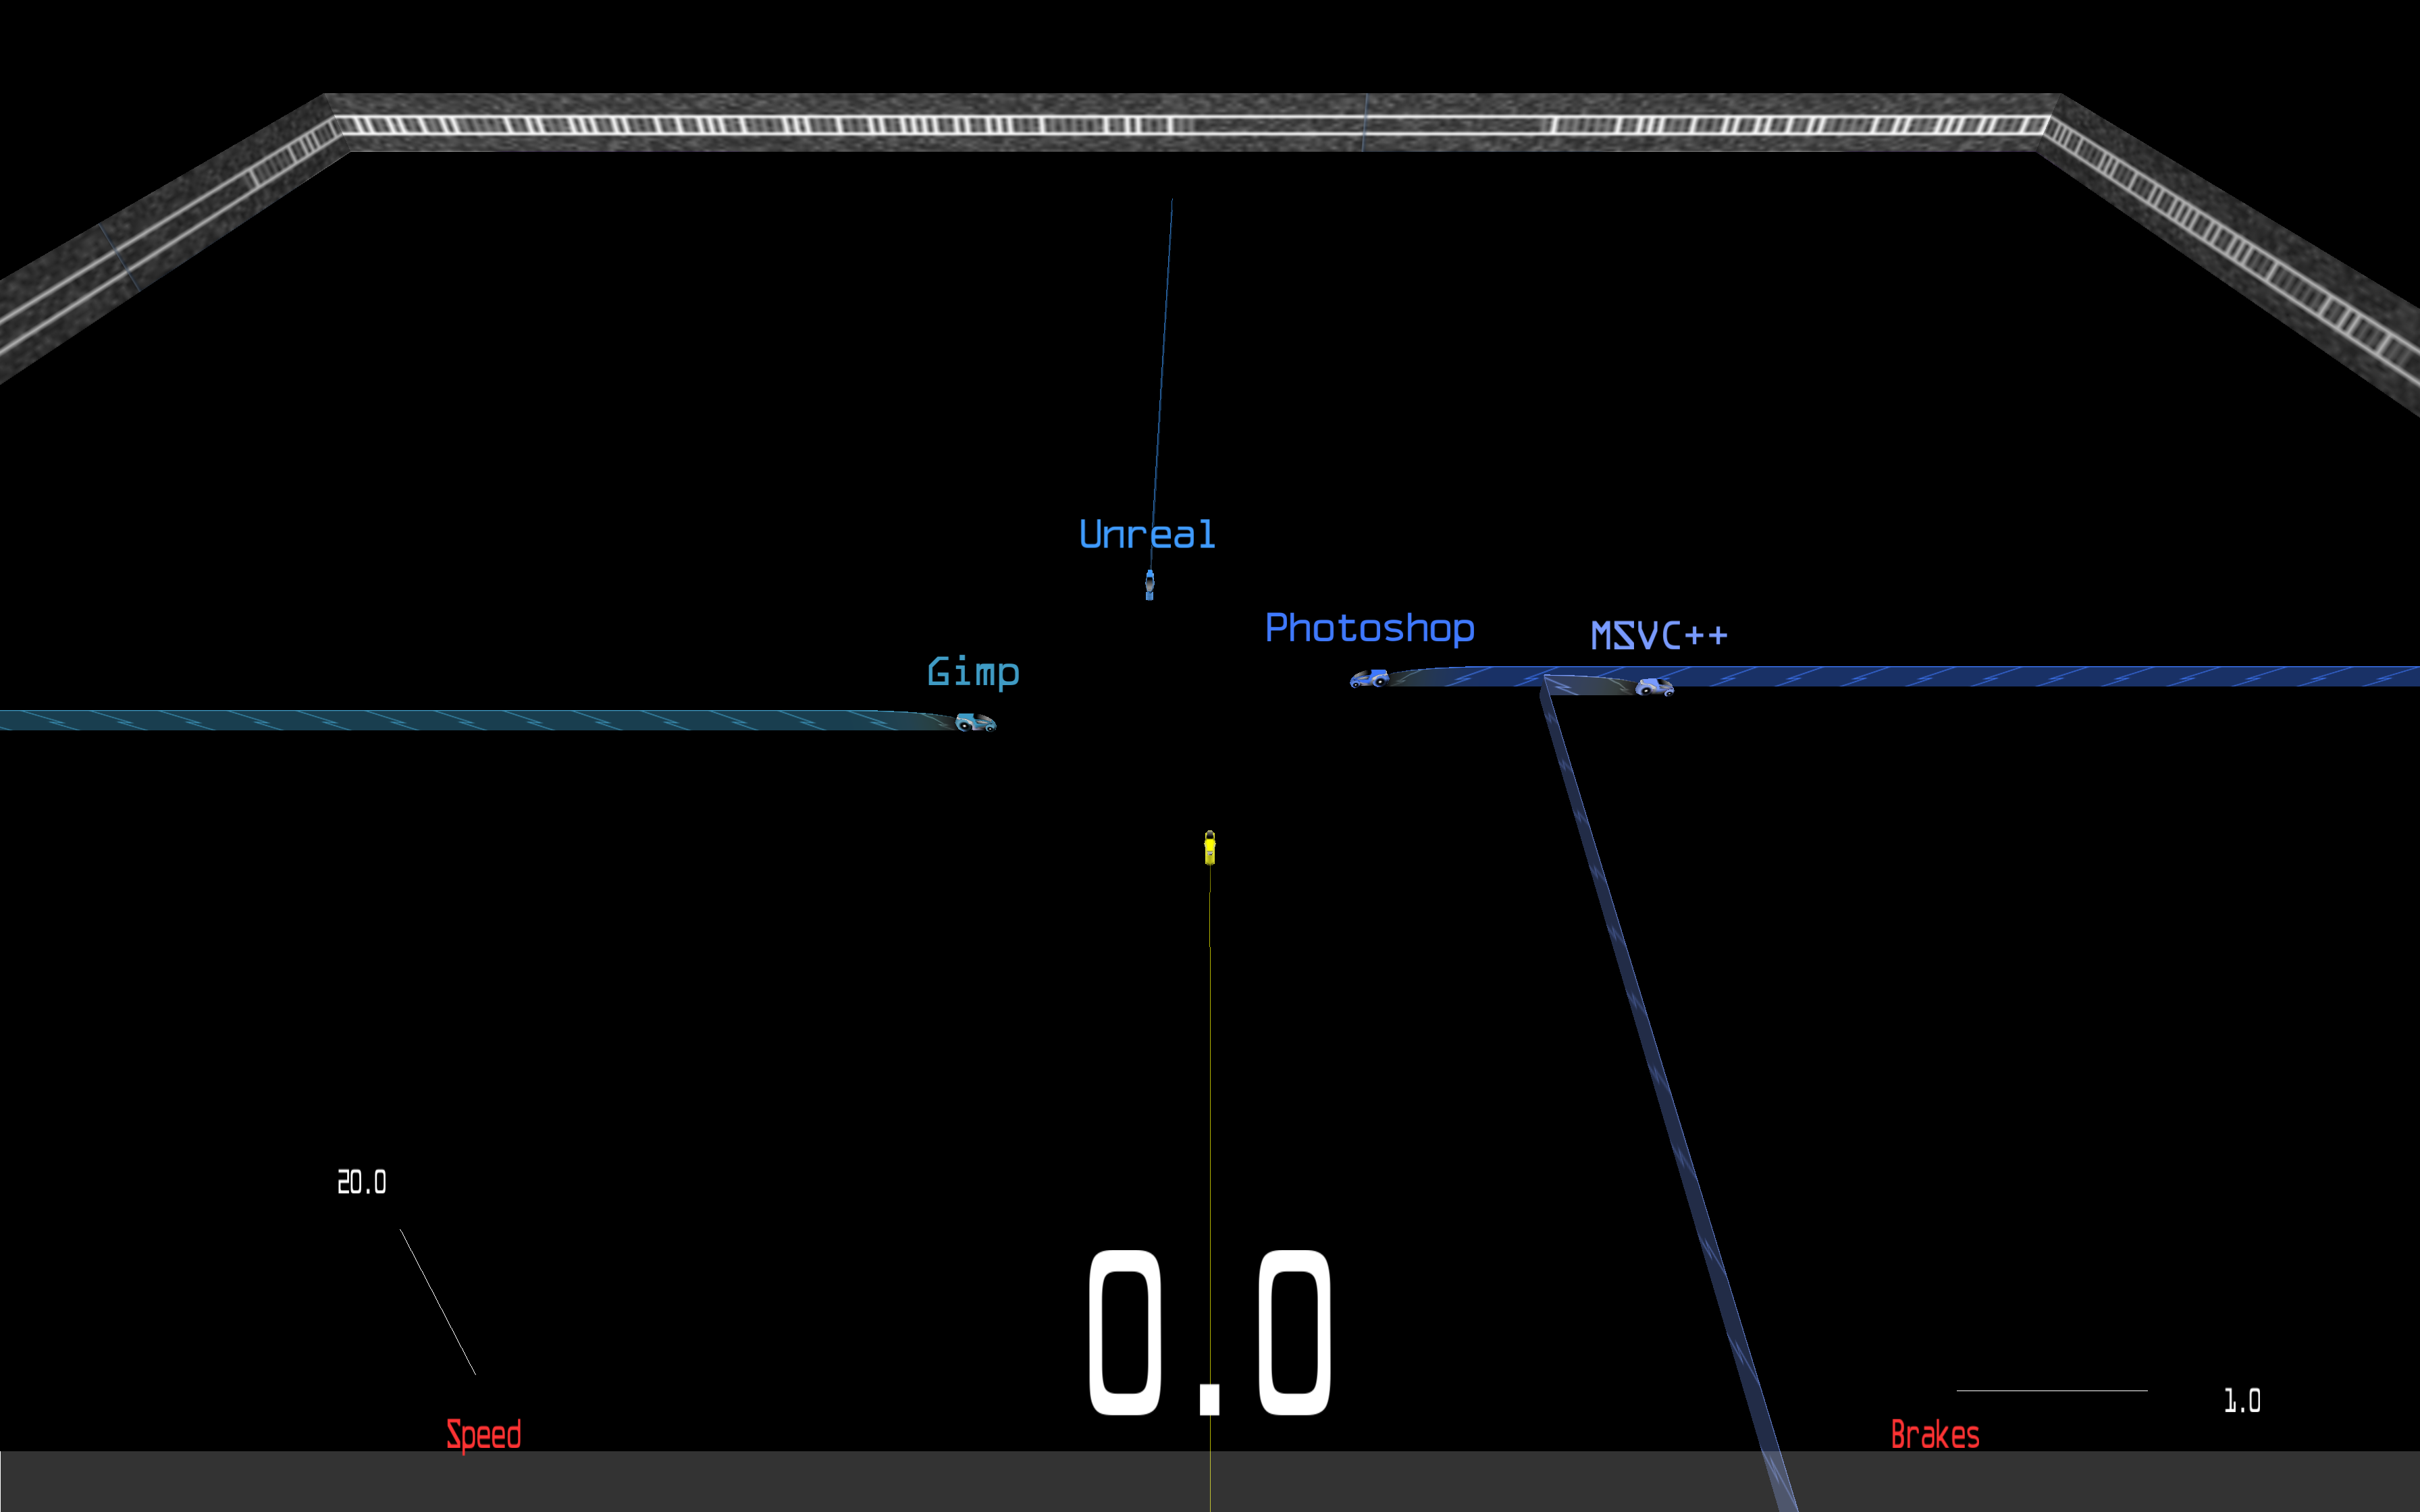
| 17:37, 28 July 2022 | CadiCockpitOn.png (file) |  |
642 KB | Cadillac | Cadillac's Cockpit with all toggles on | 1 |
| 13:23, 28 July 2022 | Cadillac Cockpit Preview.png (file) |  |
642 KB | Cadillac | Sample image of Cadillac's Cockpit | 1 |
| 00:17, 6 July 2006 | Canada.jpg (file) |  |
1 KB | Vanhayes | 1 | |
| 10:56, 25 October 2008 | Cheers1.png (file) | 25 KB | Vixuq | Cheers Userbar | 1 | |
| 16:10, 20 June 2006 | Classic-0.0.1.aacockpit.xml (Screenshot).png (file) | .png) |
400 KB | Wrtlprnft | 1 | |
| 01:56, 30 January 2006 | Classic 0 1.zip (file) | 935 KB | Lucifer | 1 | ||
| 06:33, 3 February 2006 | Classic 0 2.zip (file) | 896 KB | Lucifer | 2 | ||
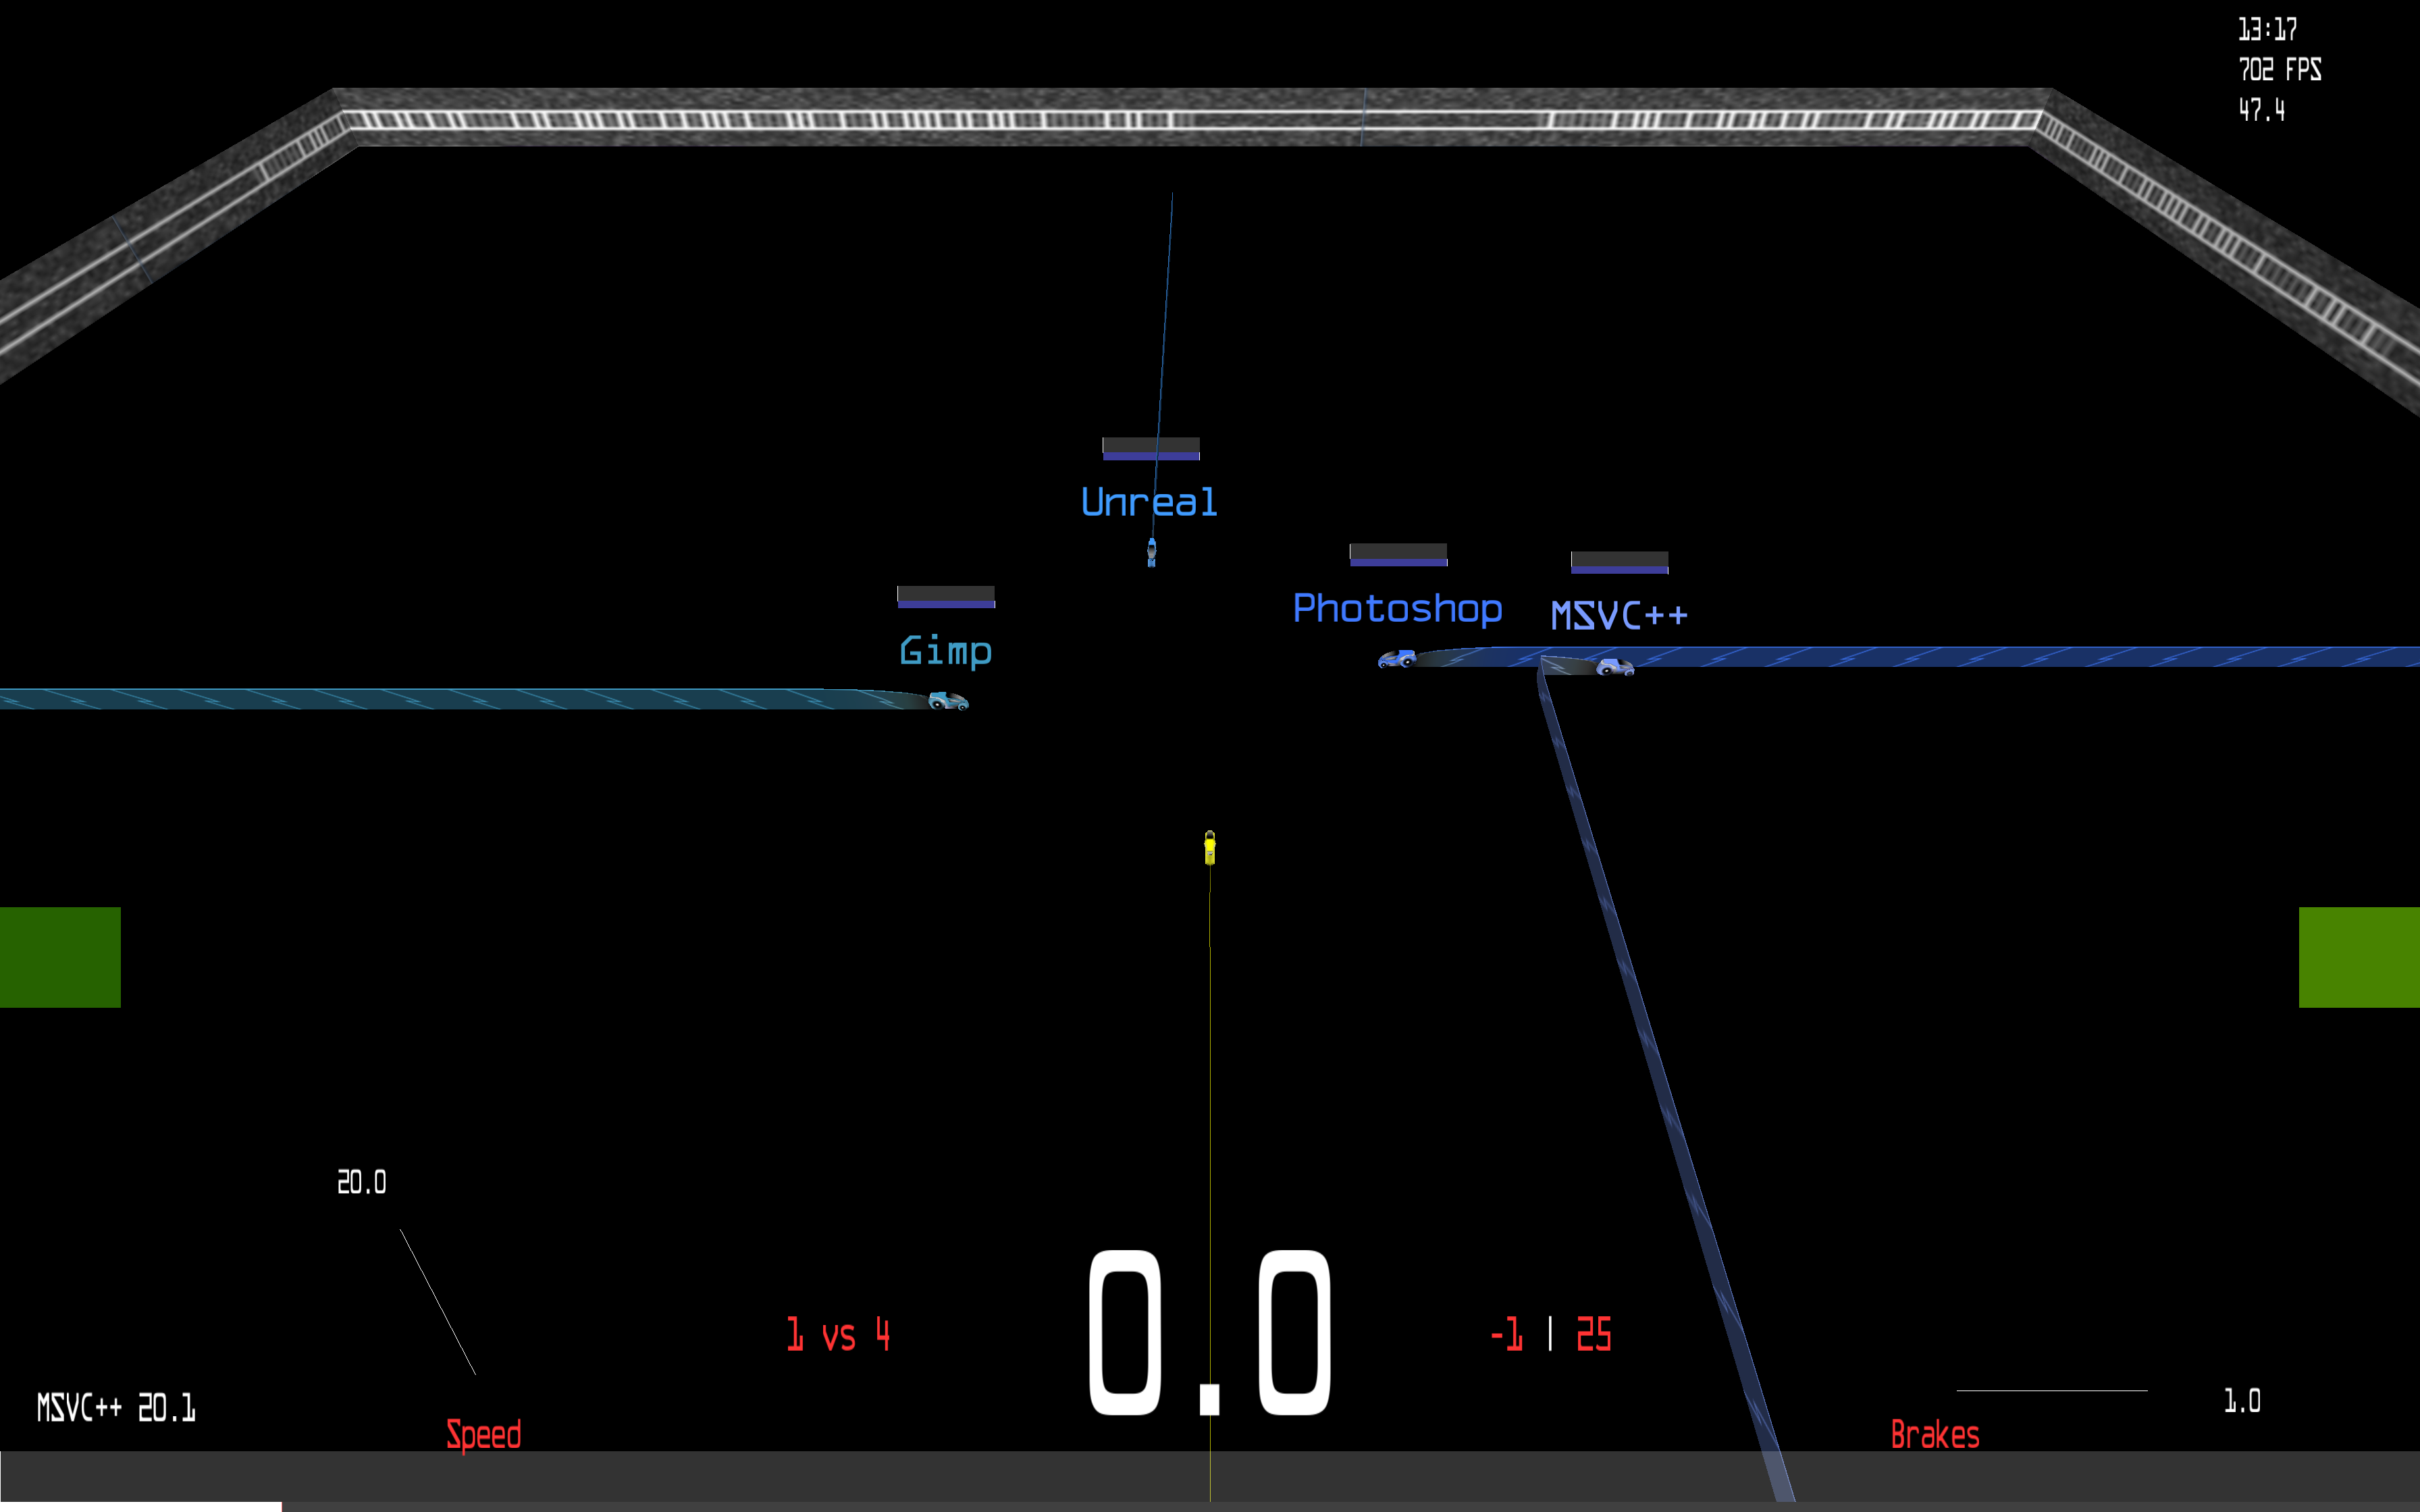
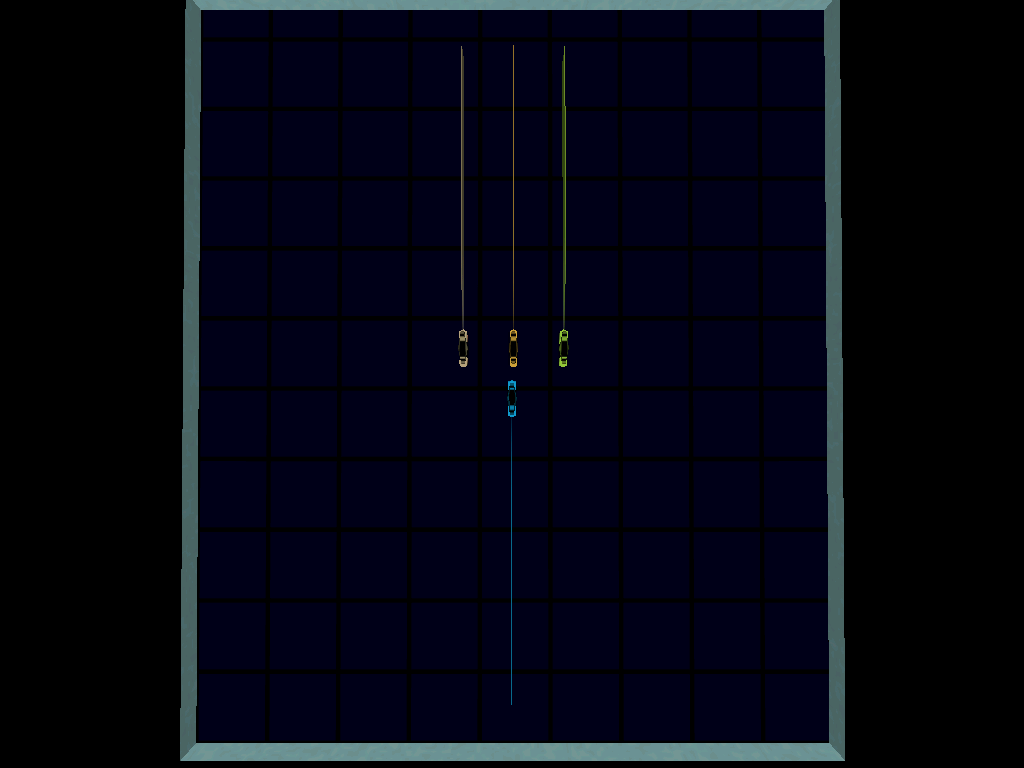
| 05:33, 9 January 2015 | Classic plus.png (file) |  |
567 KB | Dukevin | scrn shot of a cockpit called classic plus | 1 |
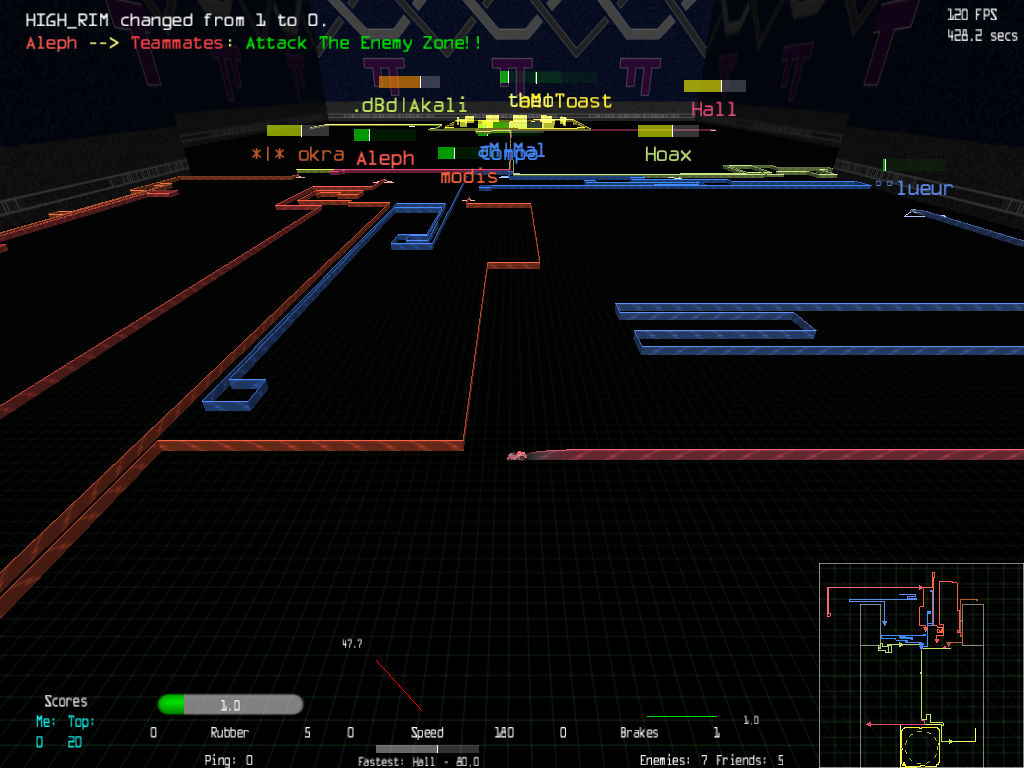
| 22:35, 12 January 2015 | Classic plus Fort.png (file) |  |
480 KB | Dukevin | more | 1 |
| 06:22, 23 October 2005 | Closeup.jpg (file) |  |
54 KB | Raoul Duke | 1 | |
| 06:23, 23 October 2005 | Closeup2.jpg (file) |  |
44 KB | Raoul Duke | 1 | |
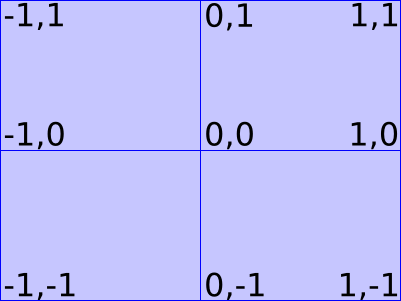
| 23:45, 16 January 2013 | CockpitAnchor169.png (file) |  |
9 KB | Epsy | What the cockpit anchoring looks like on a 16:9 output. | 1 |
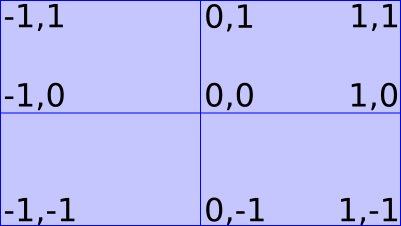
| 23:43, 16 January 2013 | CockpitAnchor43.png (file) |  |
9 KB | Epsy | What the cockpit anchoring looks like on a 4:3 output. | 1 |
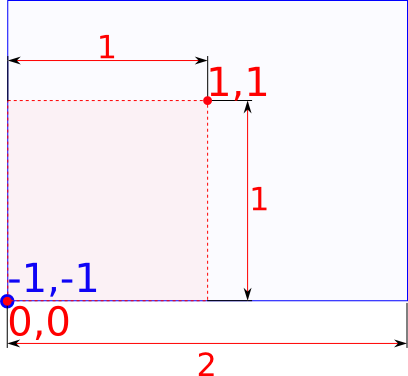
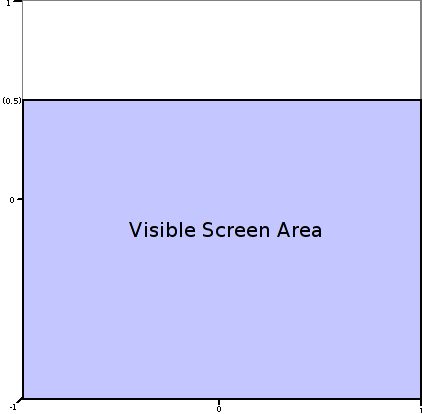
| 13:49, 17 January 2013 | CockpitPosition.png (file) |  |
8 KB | Epsy | With an anchor at -1,-1 on the output described by the blue rectangle, this shows(in red) the specification of <Position>'s coordinate space. | 1 |
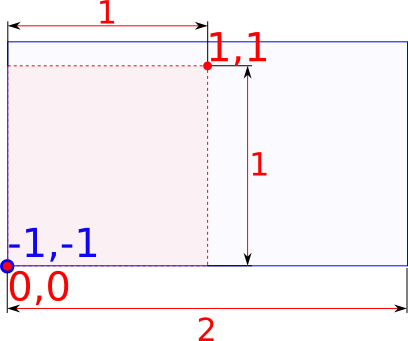
| 13:56, 17 January 2013 | CockpitPosition169.png (file) |  |
8 KB | Epsy | The scale is the same on a 16:9 aspect ratio. | 1 |
| 19:28, 30 April 2006 | Cockpit Coordinate System.png (file) |  |
5 KB | Wrtlprnft | Added transparency | 2 |
| 22:59, 27 December 2009 | Coinop.png (file) |  |
21 KB | Sinewav | 1 | |
| 21:39, 13 April 2014 | Colli.png (file) | 18 KB | Ritsuka | 1 | ||
| 03:01, 23 October 2005 | Console1.jpg (file) |  |
65 KB | Raoul Duke | 1 | |
| 03:02, 23 October 2005 | Console2.jpg (file) |  |
63 KB | Raoul Duke | 1 | |
| 03:02, 23 October 2005 | Console3.jpg (file) |  |
66 KB | Raoul Duke | 1 | |
| 03:03, 23 October 2005 | Console4.jpg (file) |  |
70 KB | Raoul Duke | 1 | |
| 18:06, 21 April 2013 | Countdown.gif (file) | 399 KB | Jericho | 1 | ||
| 05:09, 29 March 2010 | Cp01brax.png (file) |  |
29 KB | Word | 8 | |
| 00:08, 28 October 2005 | Cross maze inside.png (file) |  |
4 KB | Dlh | A player inside a cross maze | 1 |
| 21:56, 13 April 2014 | Csn1.png (file) | 4 KB | Ritsuka | 1 | ||
| 22:06, 13 April 2014 | Csn2.png (file) | 7 KB | Ritsuka | 1 | ||
| 22:12, 13 April 2014 | Csn3.png (file) | 7 KB | Ritsuka | 1 | ||
| 22:27, 13 April 2014 | Csn4.png (file) | 6 KB | Ritsuka | 1 | ||
| 18:55, 12 May 2012 | Ctfman-2v2a.png (file) |  |
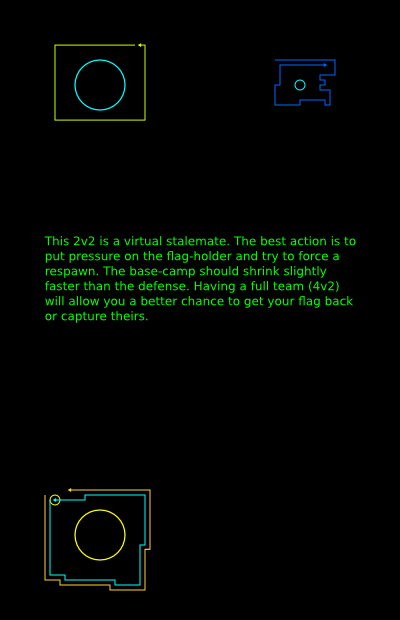
23 KB | Sinewav | This 2v2 is a virtual stalemate. The best action is to put pressure on the flag-holder and try to force a respawn. The base-camp should shrink slightly faster than the defense. Having a full team (4v2) will allow you a better chance to get your flag back | 1 |
| 16:12, 12 May 2012 | Ctfman-2v3a.png (file) |  |
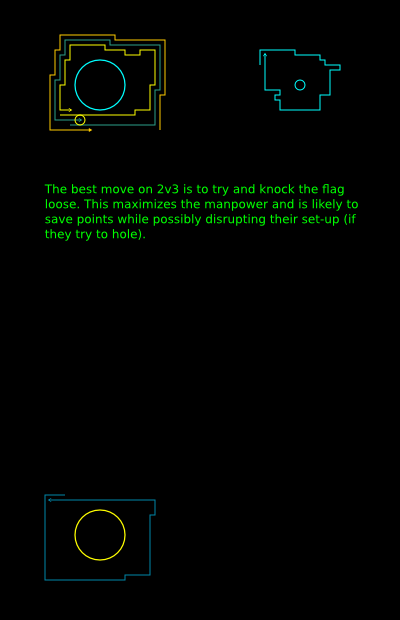
18 KB | Sinewav | The best move on 2v3 is to try and knock the flag loose. This maximizes the manpower and is likely to save points while possibly disrupting their set-up (if they try to hole). | 1 |
| 16:15, 12 May 2012 | Ctfman-2v4a.png (file) |  |
36 KB | Sinewav | This image shows bad form. When down in a 2v4 situation, the flag must be defended at all costs. Trying to regain the base is too risky and any good team will scoop the flag from you immediately. Even camping their base offers no leverage against a pro te | 1 |
| 16:19, 12 May 2012 | Ctfman-3v4a.png (file) |  |
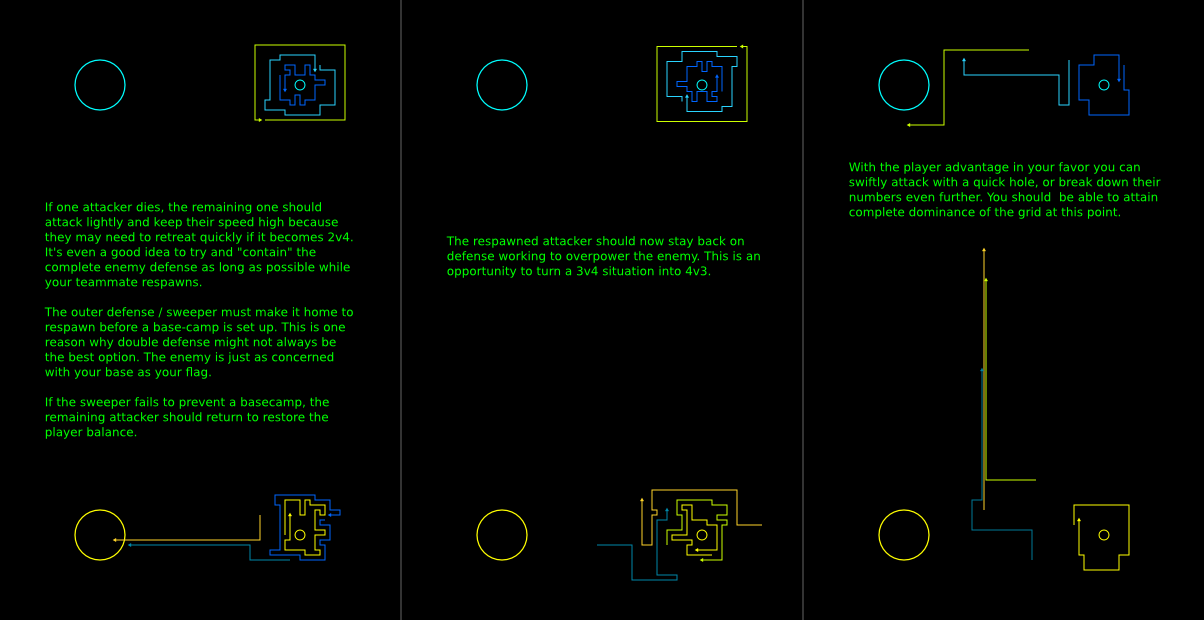
62 KB | Sinewav | If one attacker dies, the remaining one should attack lightly and keep their speed high because they may need to retreat quickly if it becomes 2v4. It's even a good idea to try and "contain" the complete enemy defense as long as possible while your teamma | 1 |
| 16:20, 12 May 2012 | Ctfman-3v4b.png (file) |  |
26 KB | Sinewav | If your defense is the first to die and create a 3v4 imbalance, the attackers should both return immediately and restore the balance with a sacrifice. The loss of 4 total points is damaging, but probably not as much as losing a second player without havin | 1 |
| 16:22, 12 May 2012 | Ctfman-4v1a.png (file) |  |
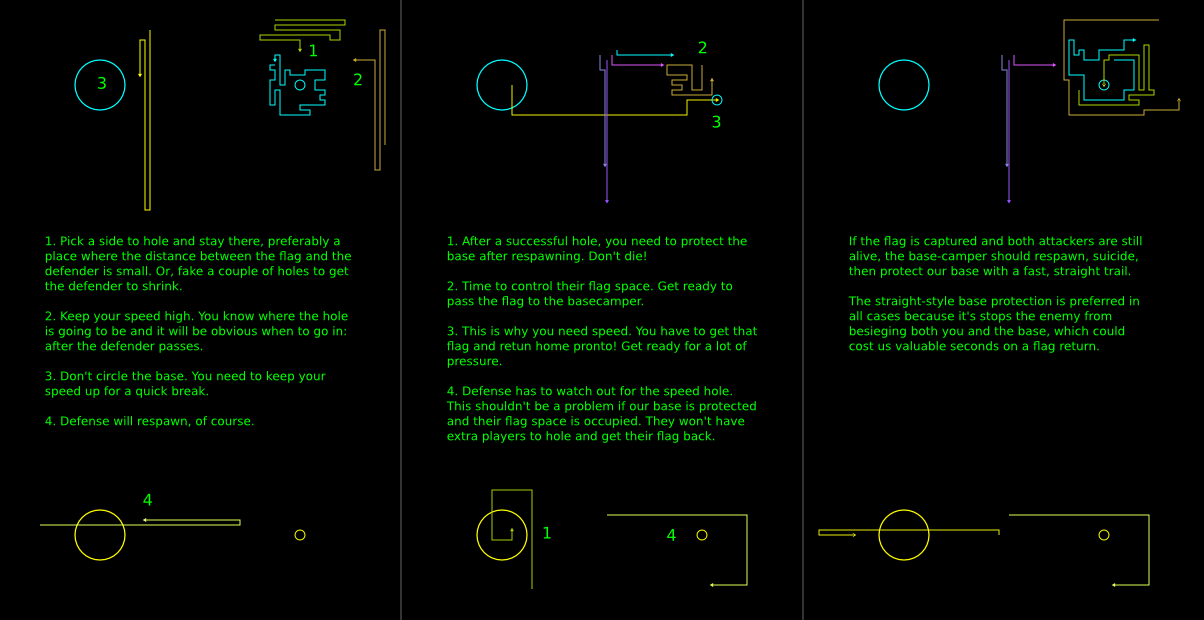
72 KB | Sinewav | 1. Pick a side to hole and stay there, preferably a place where the distance between the flag and the defender is small. Or, fake a couple of holes to get the defender to shrink. 2. Keep your speed high. You know where the hole is going to be and it will | 1 |
| 16:25, 12 May 2012 | Ctfman-4v2a.png (file) |  |
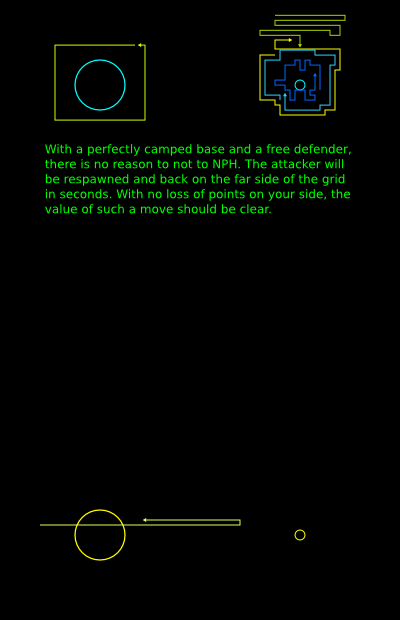
22 KB | Sinewav | With a perfectly camped base and a free defender, there is no reason to not to NPH. The attacker will be respawned and back on the far side of the grid in seconds. With no loss of points on your side, the value of such a move should be clear. | 1 |
| 16:26, 12 May 2012 | Ctfman-flag-pass1.png (file) |  |
10 KB | Sinewav | 1 | |
| 16:28, 12 May 2012 | Ctfman-flag-pass2.png (file) |  |
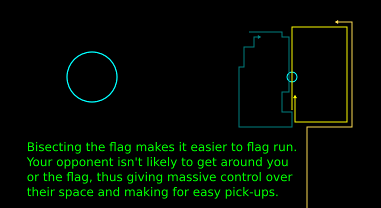
12 KB | Sinewav | Bisecting the flag makes it easier to flag run. Your opponent isn't likely to get around you or the flag, thus giving massive control over their space and making for easy pick-ups. | 1 |
| 16:32, 12 May 2012 | Ctfman-ghosting1.png (file) |  |
23 KB | Sinewav | In this setup, pos-4 (inner def) dies at start, then uses cycle invulnerability to enter outer defense after being respawned. | 1 |
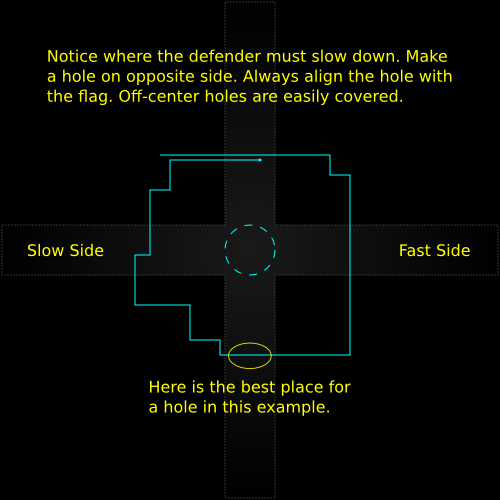
| 16:33, 12 May 2012 | Ctfman-holing1.png (file) |  |
10 KB | Sinewav | 1 | |
| 16:33, 12 May 2012 | Ctfman-holing2.png (file) |  |
35 KB | Sinewav | 1 |